


Creative Pumpkin Carving Ideas for a Spooky, Whimsical, and Elegant Halloween
Bold Creations by TJ 10/6/2026
A plain pumpkin can become a glowing monster, a midnight garden, a tiny haunted house, or a gold-painted centerpiece. The fun starts when you stop thinking of carving as one face and start treating the pumpkin like a small round canvas.
For Halloween, pumpkins do more than sit on the porch. They set the mood before anyone rings the doorbell. A jagged grin says “classic spooky.” A painted moon and stars feels dreamy. A lace-wrapped white pumpkin turns the whole entryway elegant. The best part is that you do not need advanced art skills to make something memorable. A simple pattern, the right tool, and a little patience can do a lot.
Before the ideas begin, here is the one rule that makes every project easier: match the design to the pumpkin. Tall pumpkins work well for ghosts, owls, and stacked scenes. Round pumpkins suit faces, moons, and floral patterns. Small pumpkins are perfect for painted details, place cards, and grouped displays.

Start with classic carving and give it a fresh twist
Traditional pumpkin carving never gets old because light changes everything. A design that looks simple in daylight can turn dramatic after sunset. The trick is to push the familiar jack-o’-lantern a little further.
Try a layered expression instead of a basic triangle-eyed face. Give the pumpkin raised brows, uneven teeth, or one tiny side-eye. Small changes make the face feel like a character.
A few classic carving ideas with extra personality include:
The crooked grin
Cut teeth in different sizes and angles. Leave one tooth extra long for a goblin look.
The glowing ghost face
Carve two long oval eyes and a soft open mouth. Scrape the inside wall thinner behind the face so the glow looks misty.
The haunted window
Carve a rectangle like a window frame, then add a tiny cat, candle, or bat silhouette inside it.
The crescent moon cutout
Cut a large moon shape and surround it with small drilled stars.
The stacked scarecrow
Use three pumpkins. Carve the top as a face, paint the middle like a shirt, and set the bottom on straw or leaves.
For clean carving, start by cutting the opening from the bottom instead of the top. This keeps the stem intact and makes the pumpkin look neater. It also lets you place the pumpkin over a battery candle without reaching inside.
When scooping, remove the stringy pulp first, then scrape the inner wall where the design will go. A thinner wall is easier to cut and glows brighter. Aim for about 1 inch thick in the carving area. Do not worry about making the whole pumpkin perfect. Focus on the side people will see.
A basic serrated pumpkin saw beats a kitchen knife for most cuts. It gives better control and lowers the chance of slipping. For tiny corners, use a craft knife with care, or carve the general shape first and clean the edge afterward.
A good pumpkin design is often less about perfect cutting and more about smart lighting, bold shapes, and a clear silhouette.
If you are carving with kids, let them draw faces, scoop seeds, or place decorations. Adults should handle cutting tools. For a safe glow, use battery-operated tea lights or fairy lights instead of open flames, especially on porches with dry leaves or costumes nearby.
Try modern designs with paint, patterns, and texture
Modern pumpkin design is where carving meets craft night. Paint, tape, pins, dried flowers, decals, fabric, and metallic markers can turn a pumpkin into something that looks custom, even if it took less than an hour.
This is also where Pumpkin Decorating becomes especially fun for apartments, classrooms, parties, and anyone who wants less mess. Painted pumpkins last longer than carved ones, and you can work with real or faux pumpkins.

Painted designs can be bold or delicate. For best results, wipe the pumpkin clean and let it dry before painting. Acrylic craft paint works well. Chalk paint gives a soft matte finish. Paint pens are great for thin lines, names, and small patterns.
Modern pumpkin ideas to try:
Matte black with gold constellations
Paint the pumpkin black, then use a gold paint pen to add stars and lines. It looks moody without being messy.
Color-blocked pumpkins
Tape off sections and paint each area a different color. Try cream, rust, blush, sage, or deep plum for a softer fall palette.
Drilled dot lantern
Use a hand drill or pumpkin carving drill to make patterns of holes. Spirals, stars, and dotted borders glow beautifully.
Pressed flower pumpkin
Brush on decoupage glue, press dried flowers onto the surface, and seal them with another thin layer.
Studded pumpkin
Push brass thumbtacks into a painted pumpkin in rows, swirls, or monogram shapes.
Marbled pumpkin
Float nail polish in a bowl of room-temperature water, swirl gently, then dip a small white pumpkin. This works best with mini pumpkins and good ventilation.
Texture can do as much as color. Wrap a pumpkin with lace for a gothic look, glue on velvet ribbon for a rich finish, or use twine for a farmhouse feel. If you want something playful, add pom-poms, googly eyes, felt ears, or pipe cleaner legs.
For crisp patterns, use painter’s tape and press the edges down firmly. Remove the tape before the paint fully dries, which helps prevent peeling. If paint beads up on a real pumpkin, add a primer coat or choose chalk paint.
For a no-carve glowing design, paint the pumpkin dark, then add glow-in-the-dark stars or adhesive gem stickers. Set it near a porch light during the afternoon so it can charge before night.
Choose a theme that fits your Halloween mood
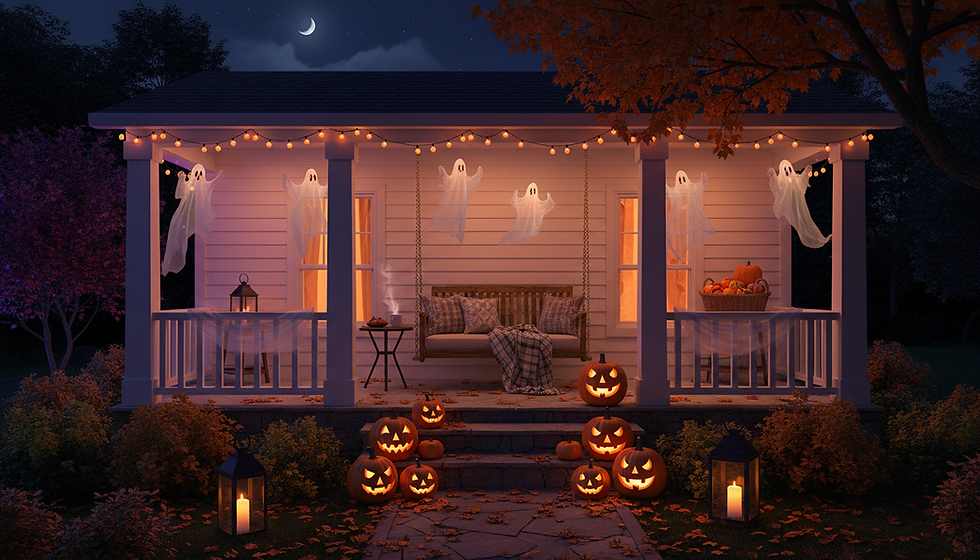
A theme makes a group of pumpkins feel intentional. You can carve one pumpkin or decorate a whole porch, but picking a mood first helps every choice feel connected. Think spooky, whimsical, or elegant, then repeat colors, shapes, and materials.
Spooky pumpkins can be eerie without being gory
Spooky pumpkins work best with shadows, sharp angles, and faces that feel slightly off. Try deep cuts, black paint, red accents, and flickering battery lights.
Ideas for a spooky display:
Carve a row of tiny mouse holes into a big pumpkin and add plastic mice nearby.
Paint a pumpkin dark gray and carve skeletal hands reaching upward.
Cut jagged teeth, then place a smaller pumpkin inside the “mouth.”
Add black twig “antlers” and glowing eyes for a woodland creature feel.
Carve a haunted tree silhouette with a moon behind it.
Use black cheesecloth, dried leaves, and bare branches around the pumpkins to frame the scene. A little restraint helps. One frightening focal pumpkin surrounded by simple glowing pumpkins can look stronger than ten busy designs fighting for attention.
Whimsical pumpkins bring charm and color
Whimsical pumpkins are perfect for anyone who likes cute ghosts, storybook creatures, and bright color. This style is forgiving because hand-drawn details and uneven shapes add charm.
Try these cheerful ideas:
Paint mini pumpkins as mushrooms with red caps and white dots.
Turn a pumpkin on its side and use the stem as a pig nose or bird beak.
Add felt wings and paint sleepy eyes for a bat that looks friendly.
Create a candy-colored pumpkin village with tiny doors and windows.
Paint a pumpkin like a stack of donuts, complete with sprinkles.
Whimsical designs often work best in clusters. Group three to seven pumpkins of different sizes. Repeat one color, such as lavender or teal, so the setup does not look random.

Elegant pumpkins make the season feel polished
Elegant pumpkins rely on limited color, clean lines, and rich materials. White, cream, gold, black, copper, and deep green all work beautifully.
Try these looks:
Paint pumpkins satin white and add thin black botanical drawings.
Use gold leaf on the ridges for a candlelit shimmer.
Wrap stems with velvet ribbon.
Place small pumpkins in a bowl with eucalyptus, dried oranges, and cinnamon sticks.
Carve a simple monogram or house number for the porch.
For elegant carving, keep the design simple. A single large leaf cutout, a moon phase pattern, or a clean row of arches can look refined. Use warm white lights inside instead of cool-toned lights for a softer glow.
Use the right tools and materials for cleaner results
Creative pumpkin work gets easier when every tool has a job. You do not need a huge kit, but a few basics make a big difference.
Tool or material | Best use | Helpful tip |
Pumpkin saw | Cutting faces and large shapes | Saw with short, steady motions instead of pushing hard. |
Scoop or metal spoon | Removing seeds and pulp | Scrape the carving wall thinner for easier cutting. |
Linoleum cutter | Shaving the skin without cutting through | Use it for glowing shaded areas and fine details. |
Hand drill | Making dot patterns | Mark dots first with a washable marker. |
Painter’s tape | Creating clean painted sections | Press edges down and remove while paint is slightly wet. |
Acrylic paint | Color and graphic designs | Use two thin coats instead of one thick coat. |
Paint pens | Lettering and small details | Let each color dry before adding another. |
Battery lights | Safe illumination | Try fairy lights for a softer sparkle. |
For carving patterns, print a simple template or draw one on paper first. Tape it to the pumpkin, then poke holes along the lines with a pushpin. Remove the paper and cut along the dotted outline.
For shaded designs, do not cut all the way through. Scrape away only the orange skin to reveal the lighter flesh underneath. When lit from inside, these areas glow softly. This technique works well for moon faces, portraits, leaves, feathers, and clouds.
If your pumpkin wobbles, trim a small flat spot on the bottom or set it on a bed of moss, leaves, or a shallow bowl. For outdoor displays, weigh down lightweight faux pumpkins with small stones inside.
To help carved pumpkins last longer, keep them cool, out of direct sun, and away from heat. After carving, wipe cut edges dry. If the pumpkin starts to shrivel, soak it in cool water for a short refresh, then dry it well before lighting.
Add personal details that make your pumpkin stand out
The most memorable pumpkins usually say something about the people who made them. A pumpkin can nod to a favorite pet, a family inside joke, a beloved book, a local team color, or the style of the home it sits in front of.
Personal touches do not have to be complicated. Try initials, house numbers, favorite flowers, constellations from a birth month, or tiny painted portraits of pets. If the pumpkin will sit near the front door, match it to your wreath, doormat, or porch planters. If it will be part of a party table, coordinate it with napkins, candles, and candy bowls.

A few personalization ideas:
Pet portrait pumpkin
Paint a simple face, add felt ears, and use the stem as part of the nose or hair.
Family pumpkin row
Give each person a mini pumpkin with a different expression, hat, or color.
Neighborhood welcome pumpkin
Carve or paint your house number, then surround it with smaller glowing pumpkins.
Memory pumpkin
Paint symbols from favorite fall traditions, such as apples, stars, leaves, or campfire shapes.
Party guest pumpkins
Use mini pumpkins as place cards. Write names with paint pens and let guests take them home.
If you love sharing your creations, set up a simple photo spot before the pumpkins start to fade. Photograph them at dusk, when there is still enough natural light to see the details and the inner glow has started to show. Turn off harsh porch lights if they wash out the design. A few leaves, a dark cloth, or a wood step can make the photo feel finished.
You can also turn pumpkin decorating into a friendly challenge. Pick a theme, set out shared supplies, and let everyone interpret it differently. Categories like “spookiest,” “funniest,” “most elegant,” and “best use of the stem” keep things light and fun.
The best pumpkin is not the neatest one on the block. It is the one that makes people stop, smile, laugh, or lean in for a closer look. Choose a style, gather a few good tools, and let your pumpkin show off a little personality. Then light it up, snap a photo, and share the finished creation with someone who will appreciate the glow.

Comments